Introduction
What are Custom Fields?
Custom Fields are additional fields that can be added to transactions, allowing your team to easily monitor specific information that isn't already included in the transaction details.
Custom Fields allow you to efficiently gather and track custom data that helps your team drive transactions to completion, including custom date, list, and text fields.
How They Work
When a Custom Field is added, it will be:
- A permanent, editable field on each transaction
- Displayed on Coversheets
- Available as an Autofill Tag
- Included in downloaded Transaction Spreadsheet Reports
Any custom date-type fields turned on will also be:
- Added as a Relative Trigger Dates for Tasks and Scheduled Messages. Learn more about Adding Relative Due Dates →
- Available to be synced to your calendar. Learn how to sync key dates to calendars →
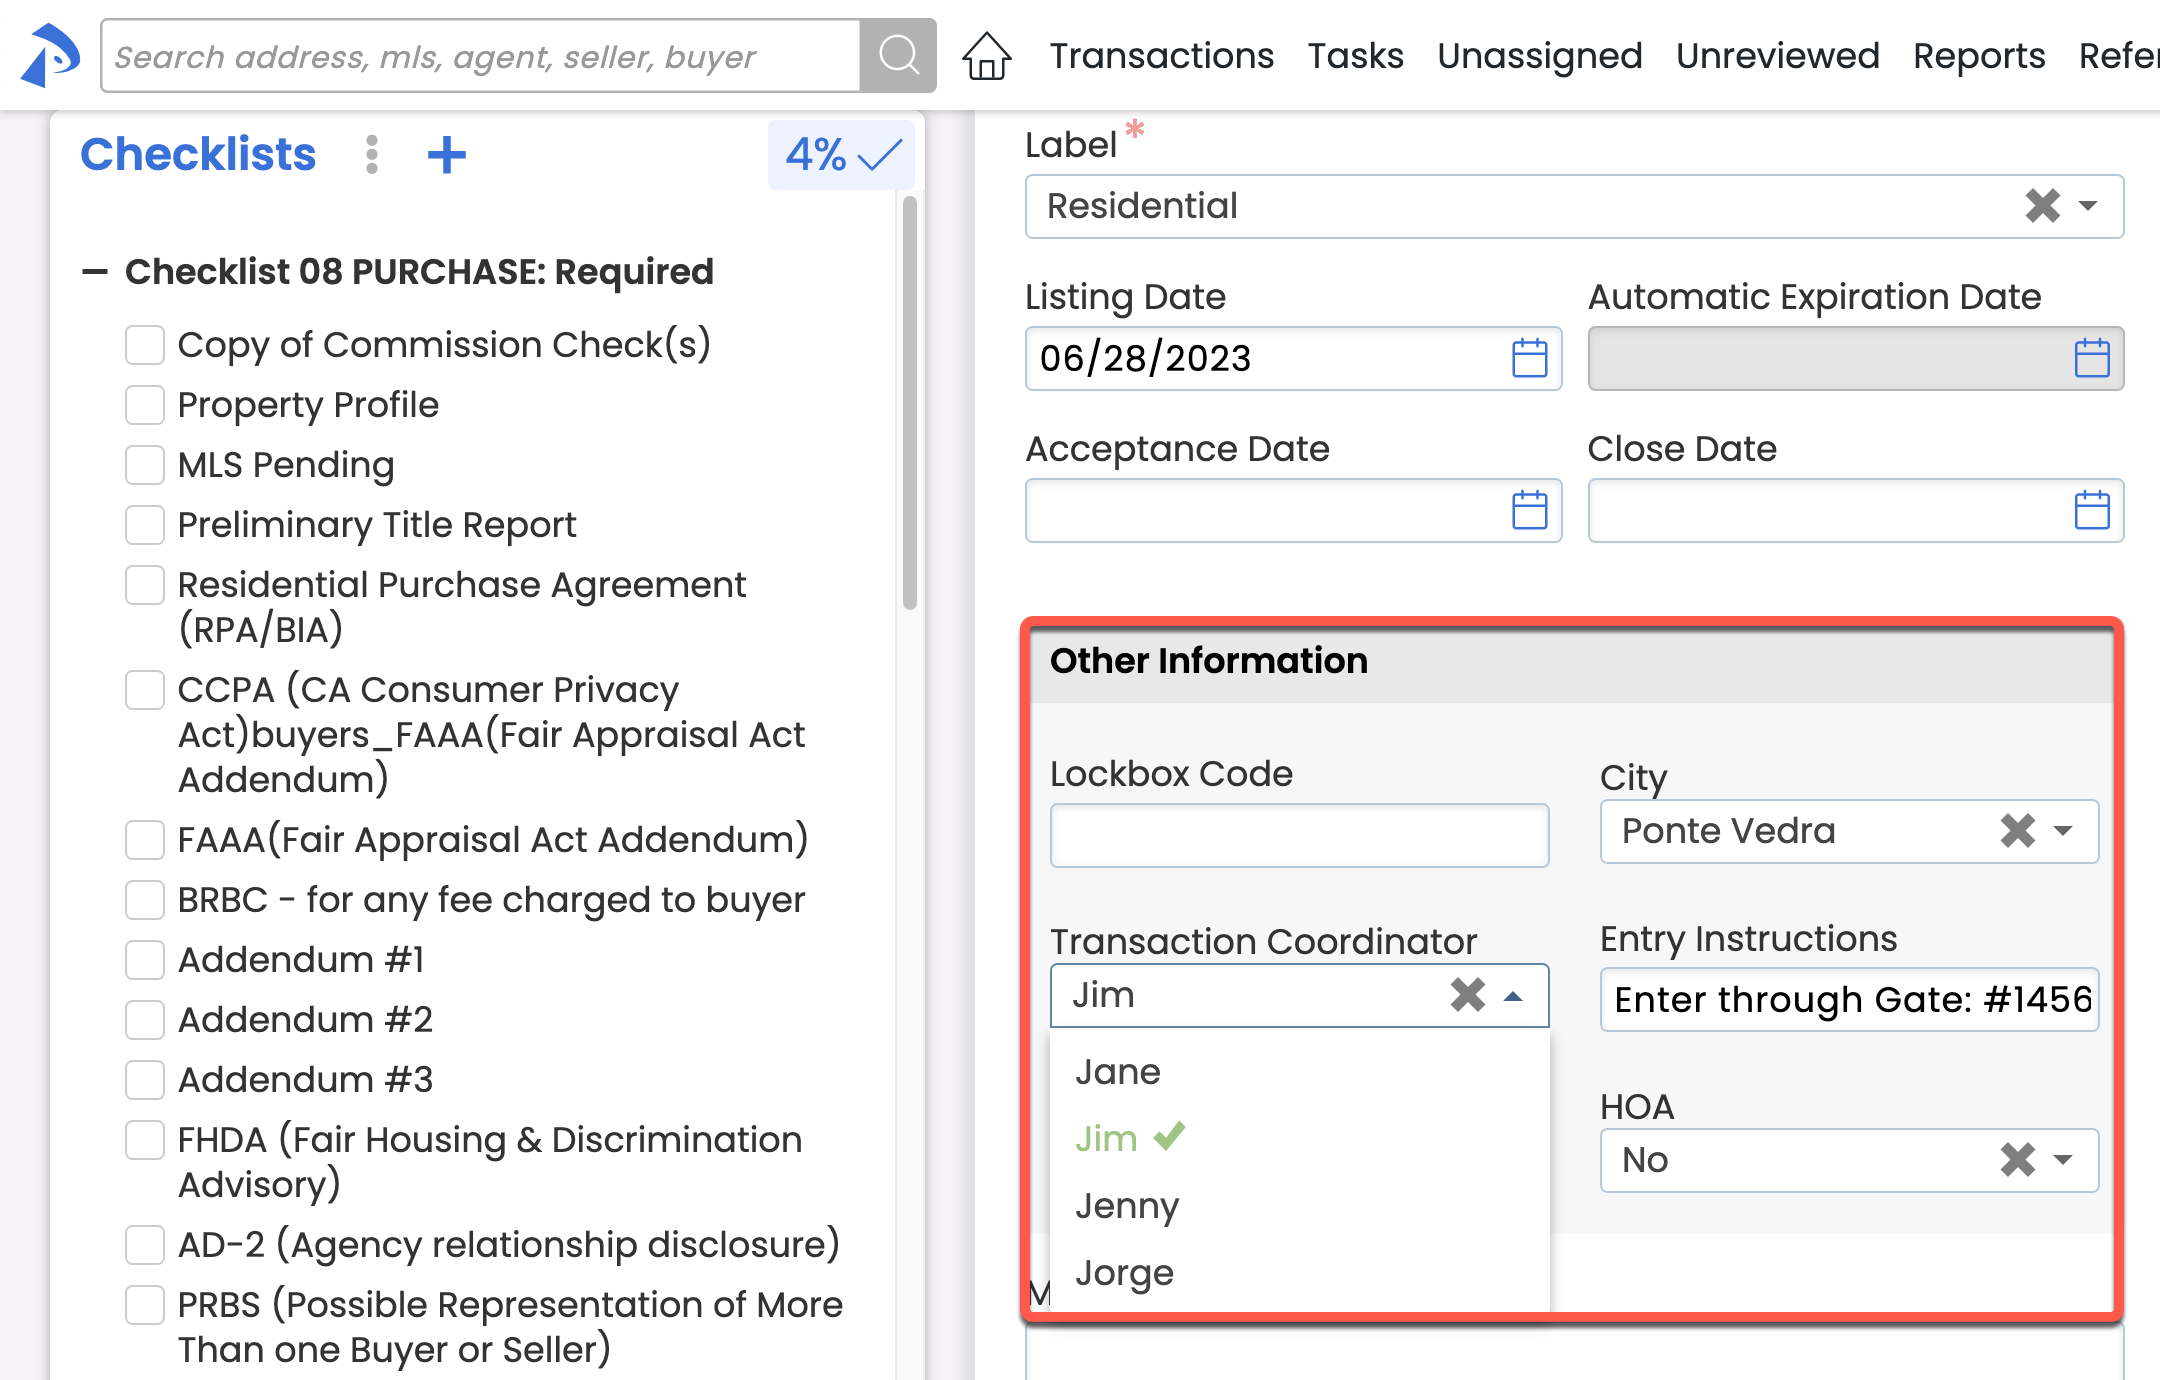 Custom Fields when editing a transaction Custom Fields when editing a transaction
| 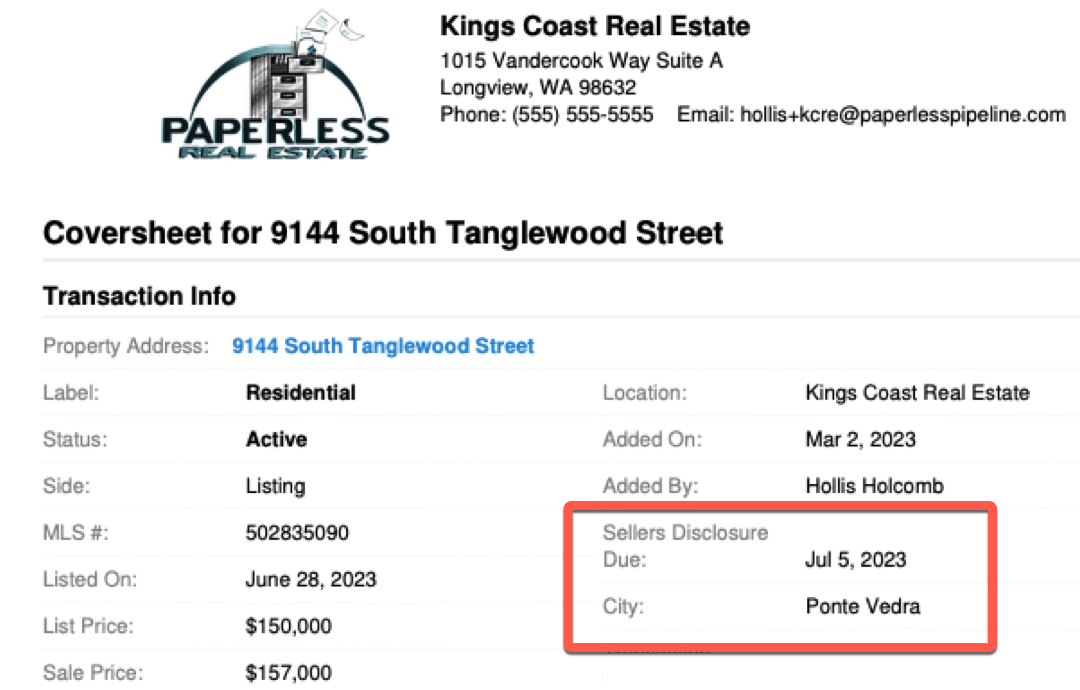 Custom Fields on Coversheets Custom Fields on Coversheets
|
Best Practices
For optimal use of Custom Fields, follow these guidelines:
- Avoid unneeded clutter: Only gather necessary and useful information.
- Avoid confusion: Name fields using your office's standard terminology.
- Do not re-cycle fields: If you need another field, create a fresh new one.
- Plan carefully: Once data is gathered for a field, deleting it will delete all its data.
How To
Create a New Custom Field
Learn how to create a new Custom Field to gather and track custom information on transactions.
To create a new Custom Field:
- Go to Admin / Settings by clicking your name in the upper right corner, then [Admin / Settings].
- Select [Custom Fields] from the Customize section of the left menu.
- Click [Select Field Type] then select a Field Type from the dropdown menu.
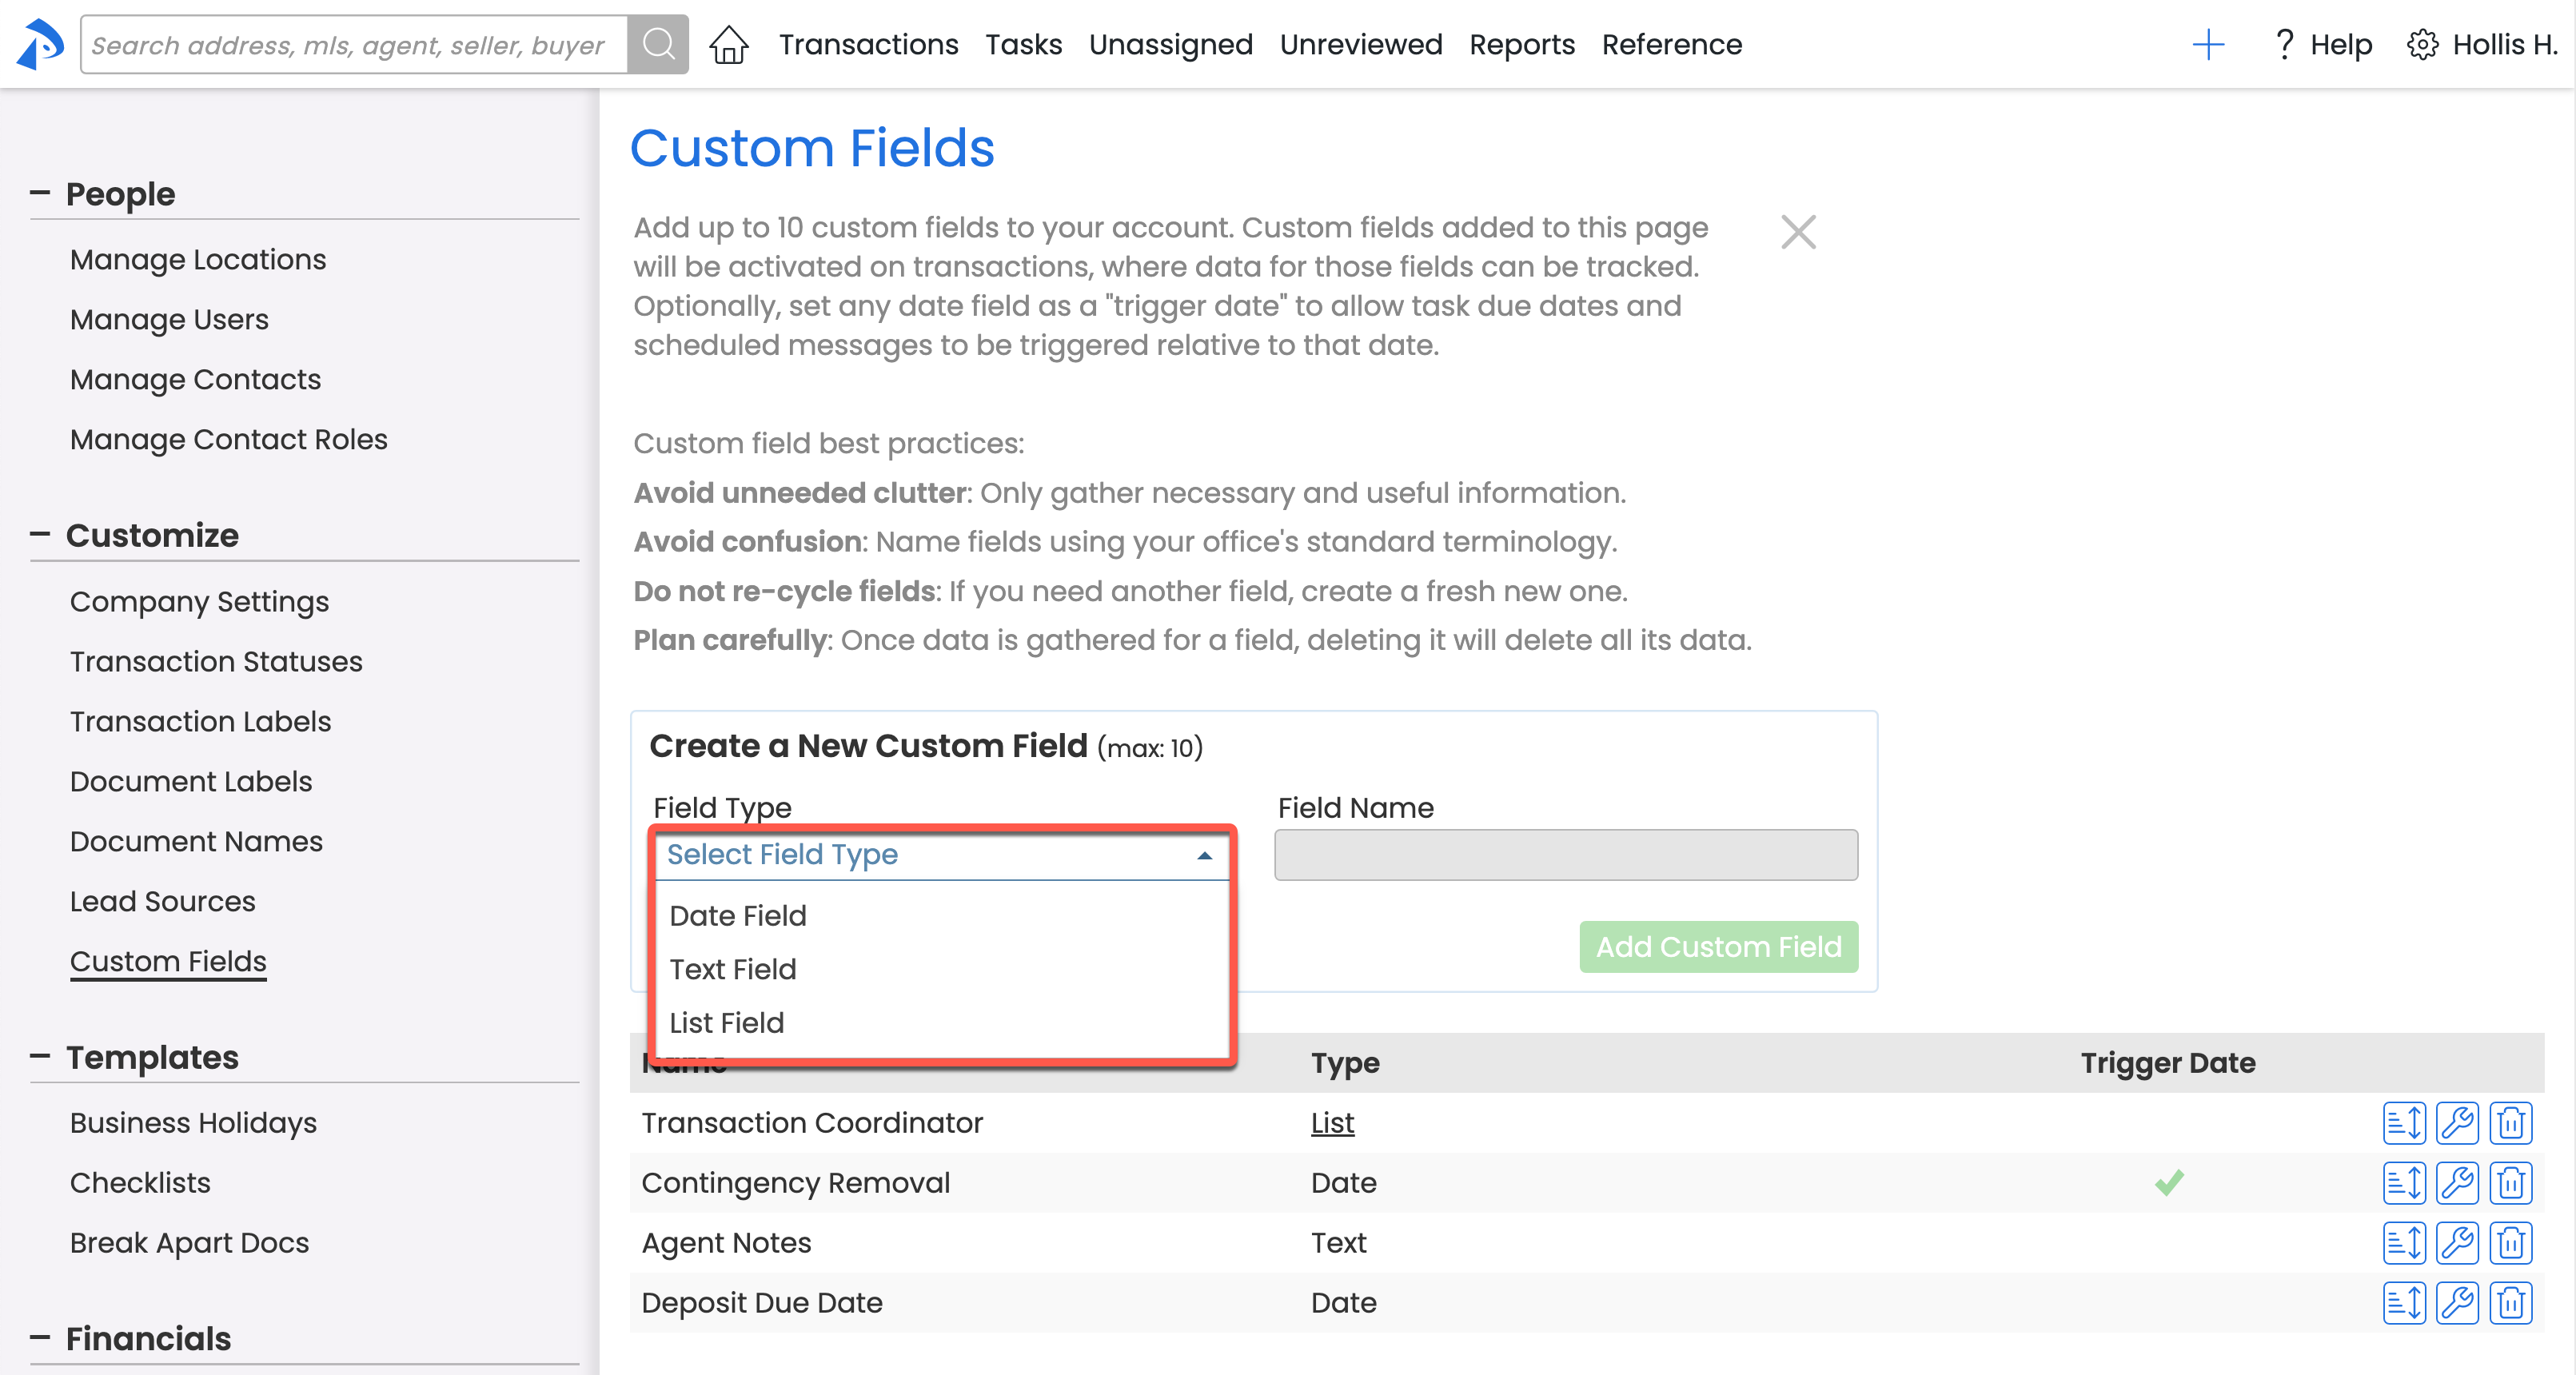
- Enter the Field Name.
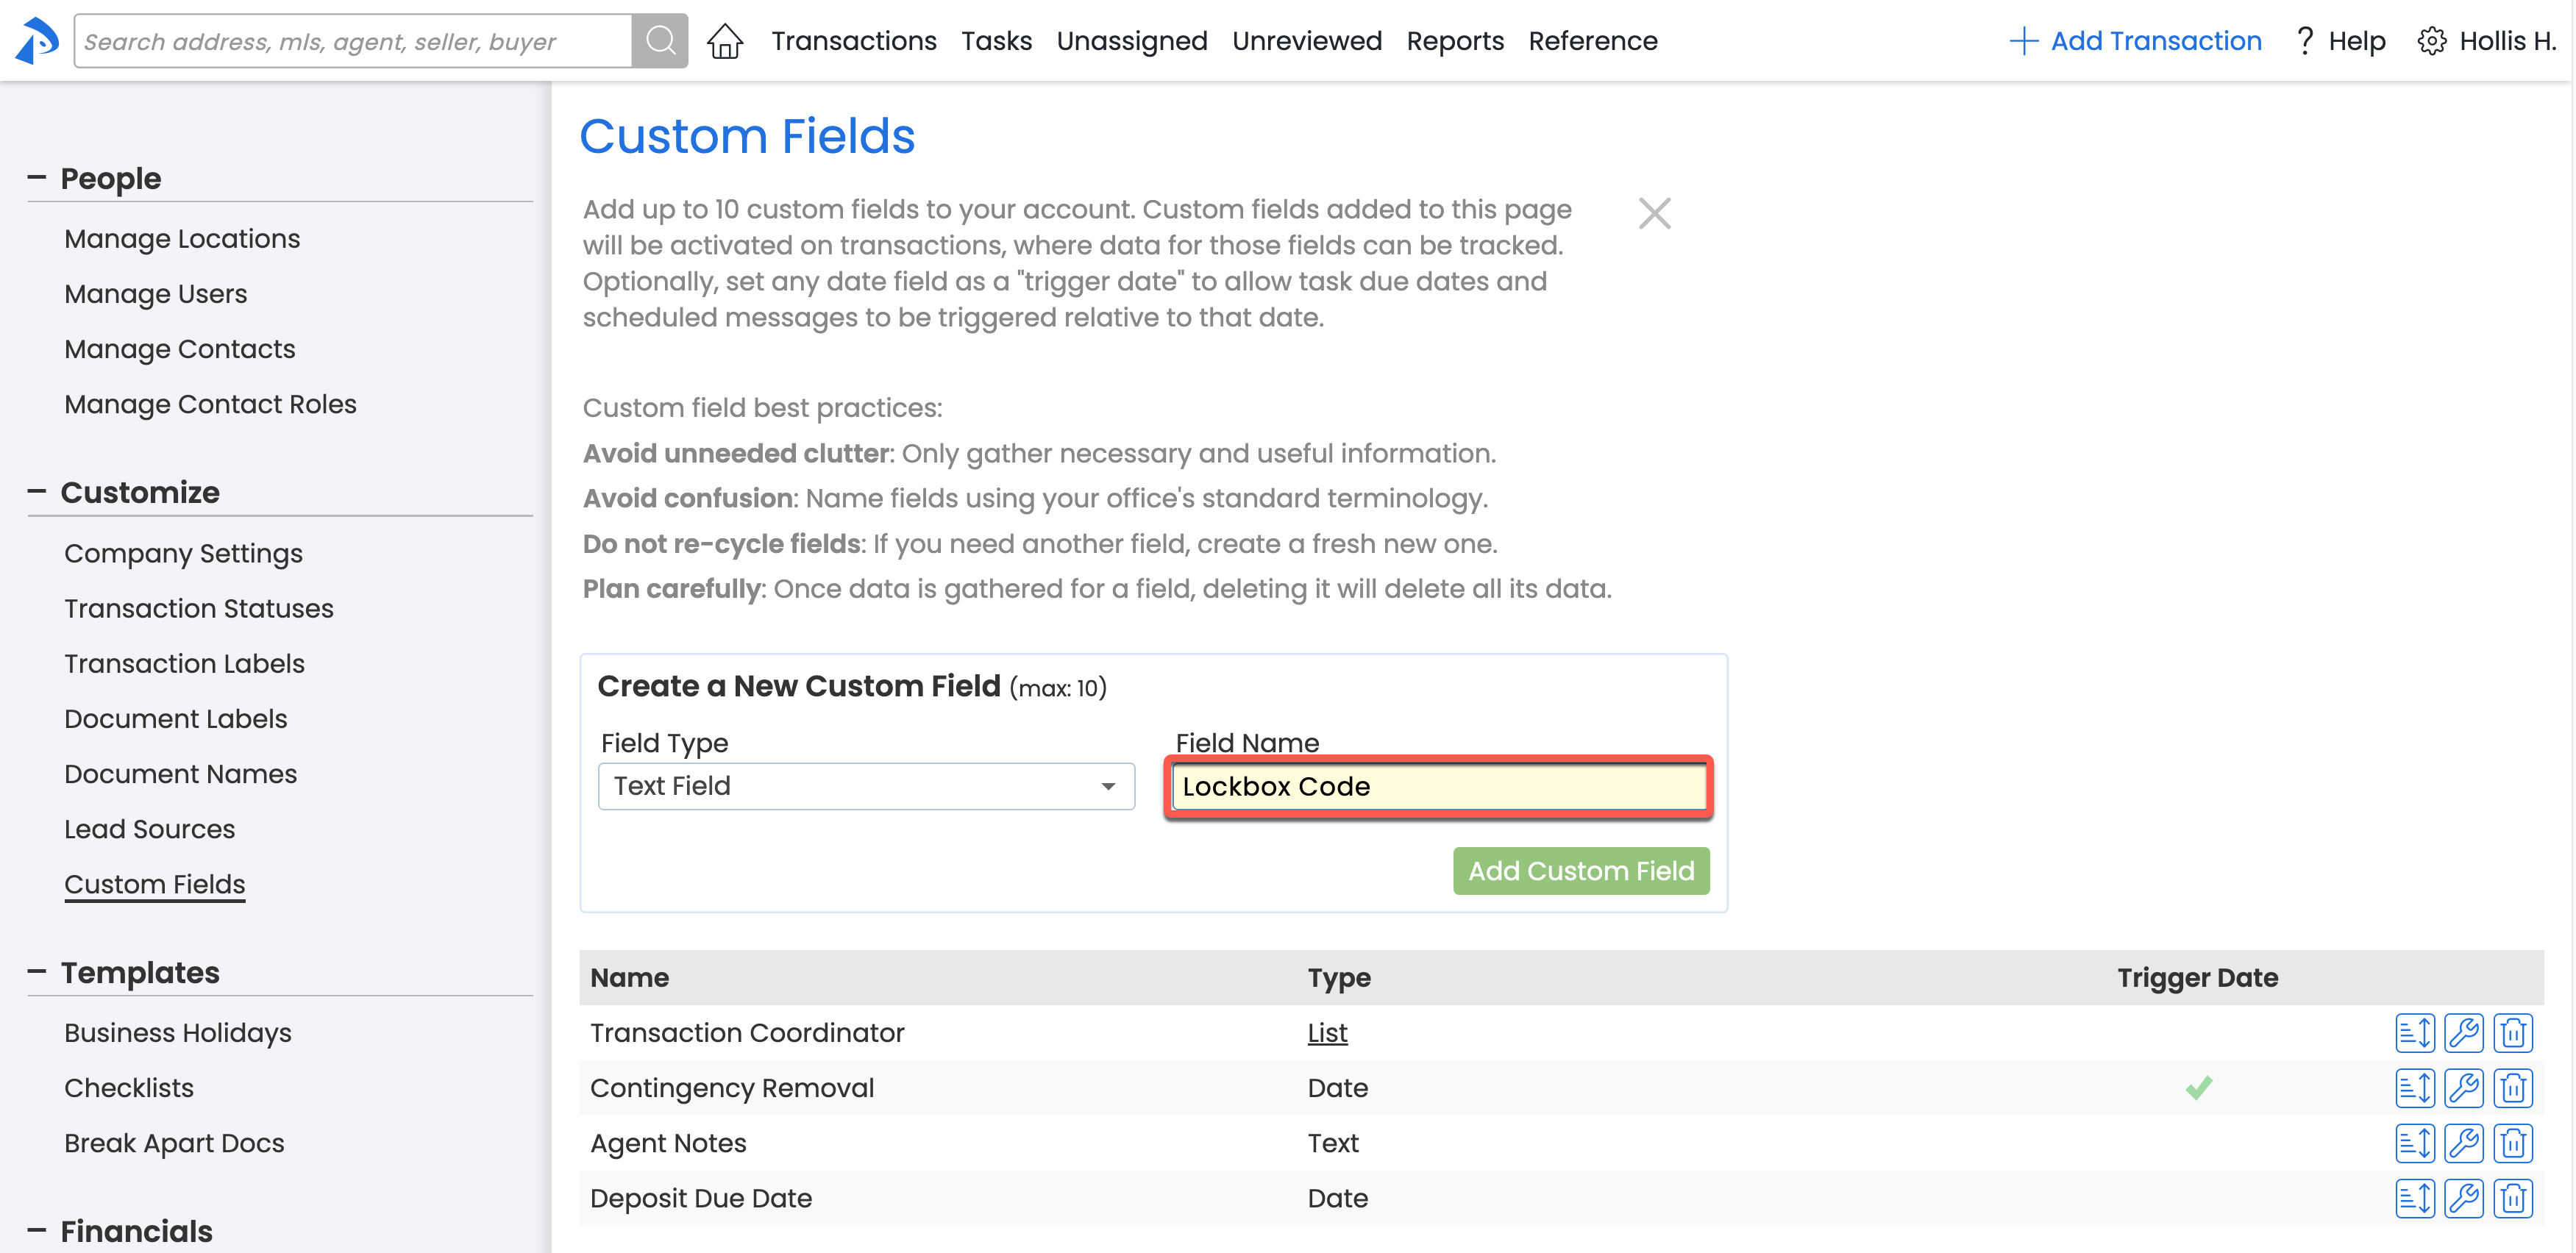
- Complete any additional details for the new field.
• If you are adding a Custom List Field, enter up to 20 options. Click [+] to add additional options.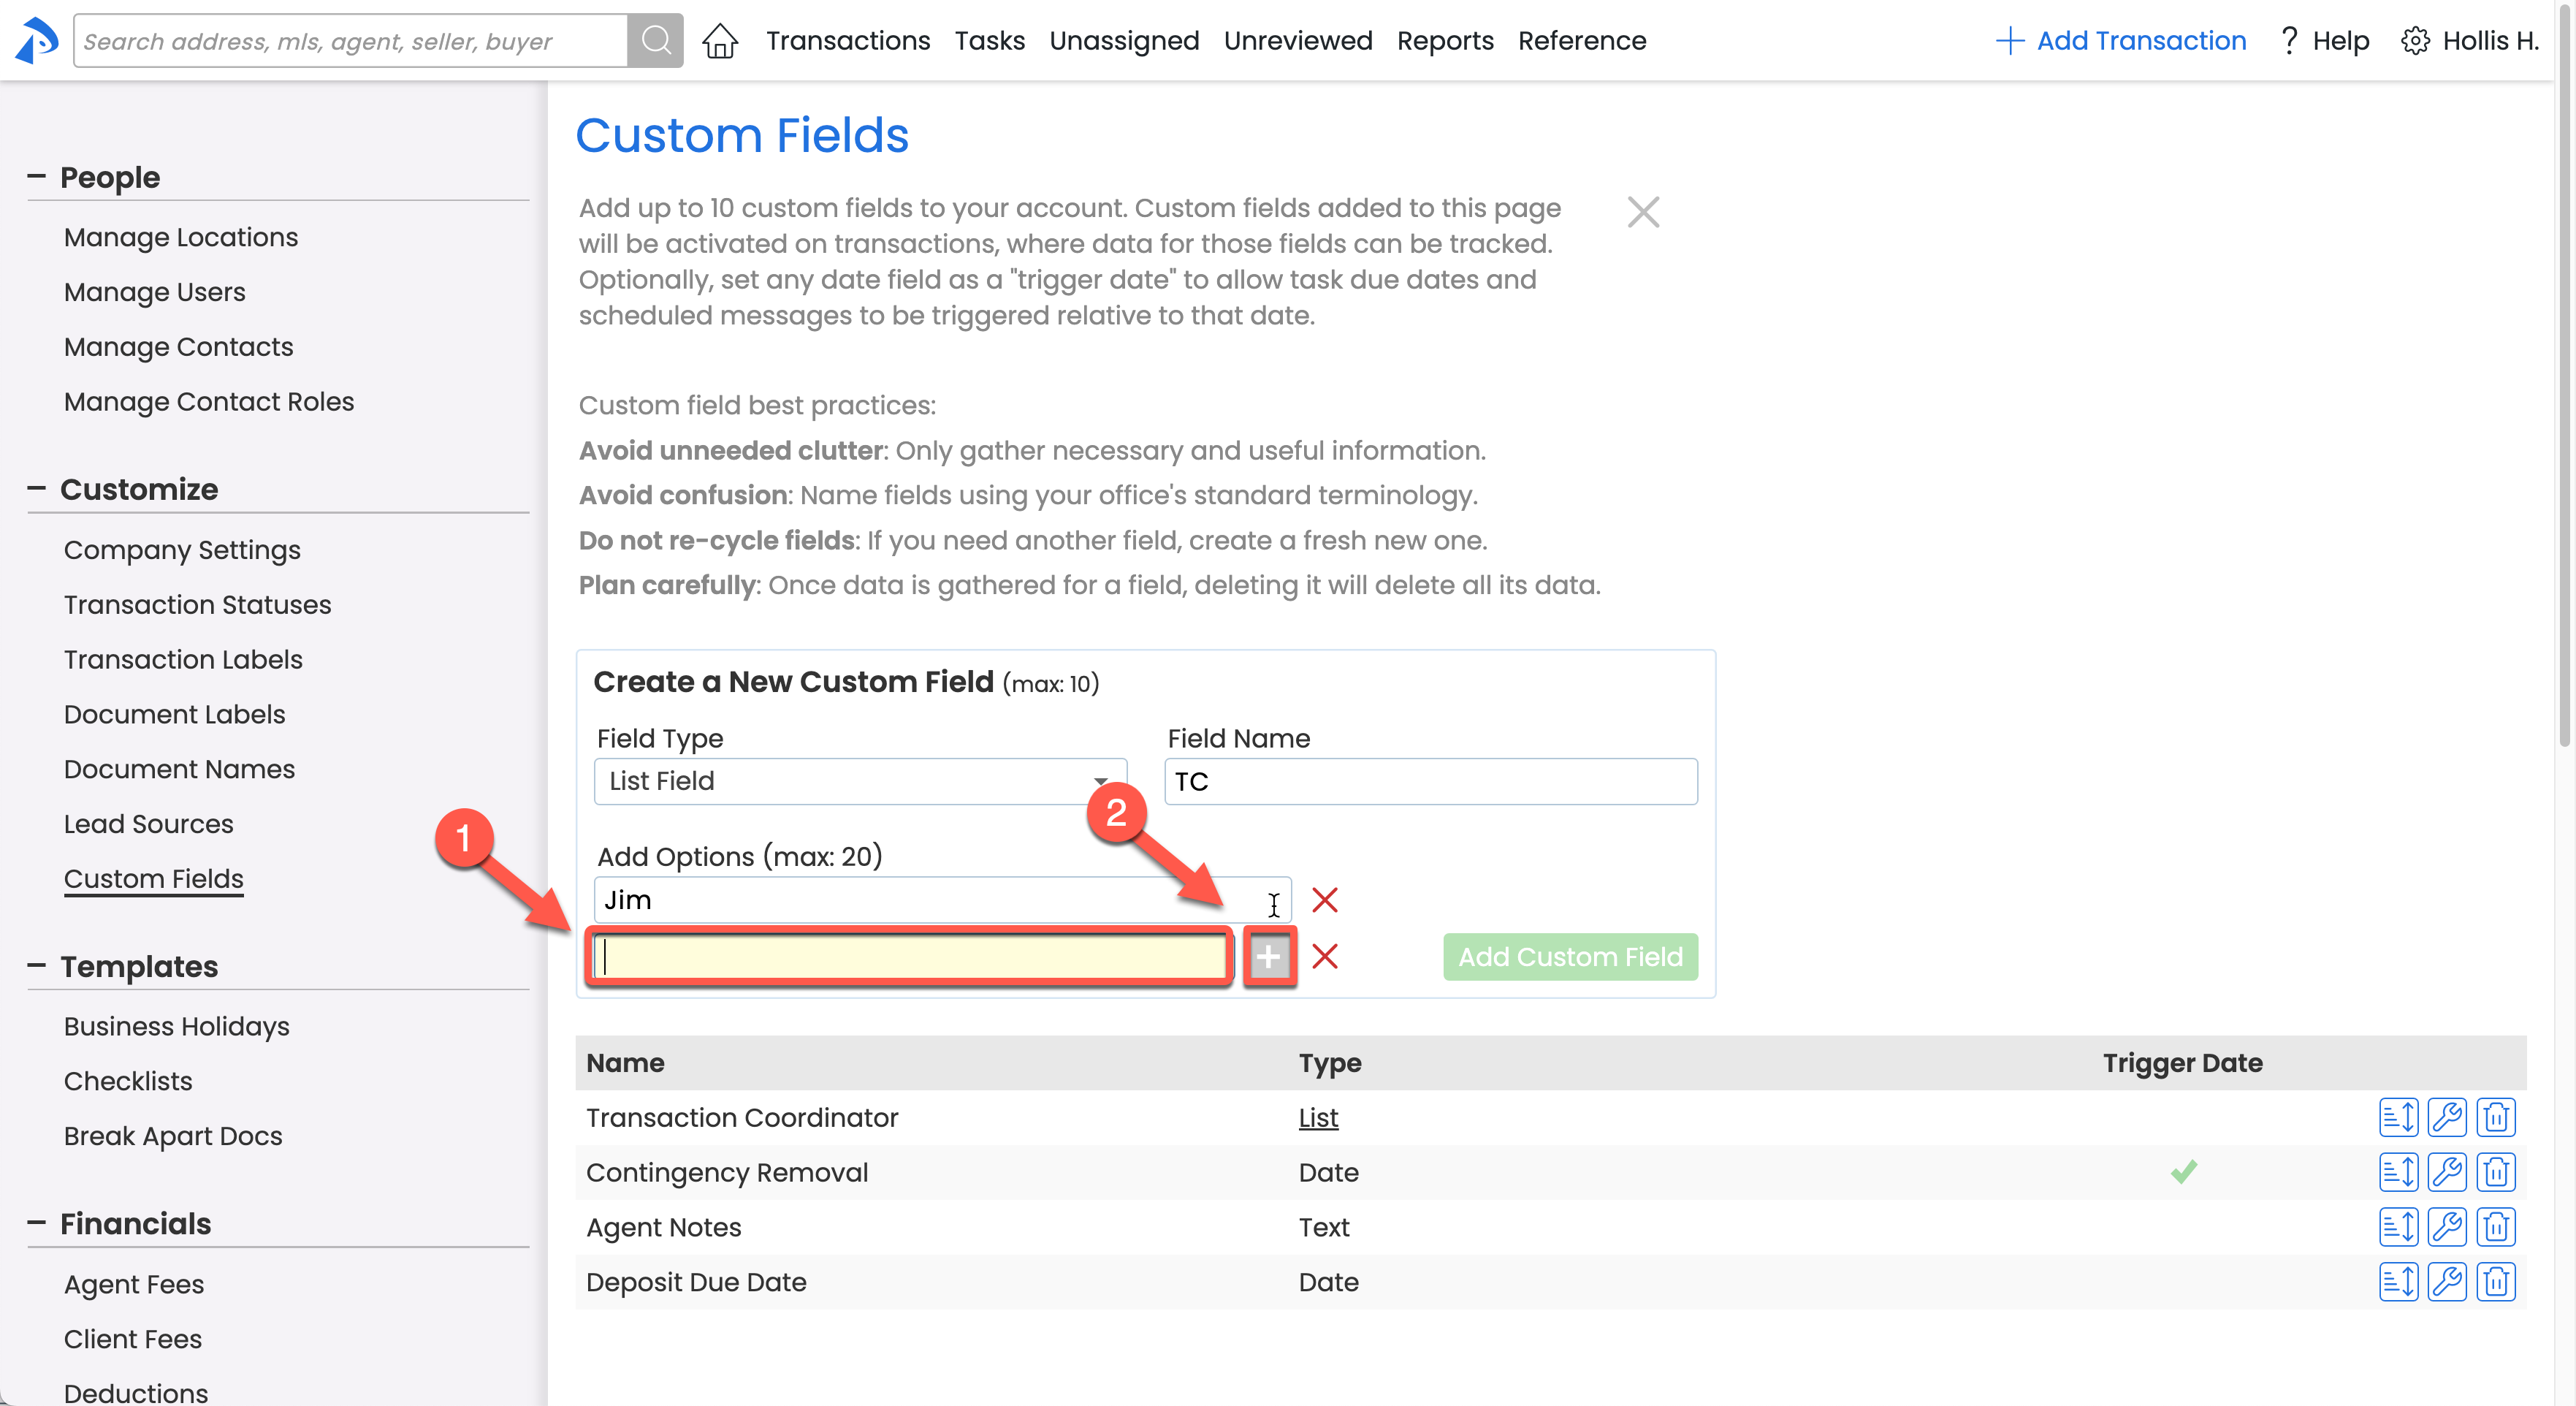
• If you are adding a Custom Date Field, you can optionally check [Add as Trigger Date] to allow task due dates and scheduled messages to be triggered relative to the date.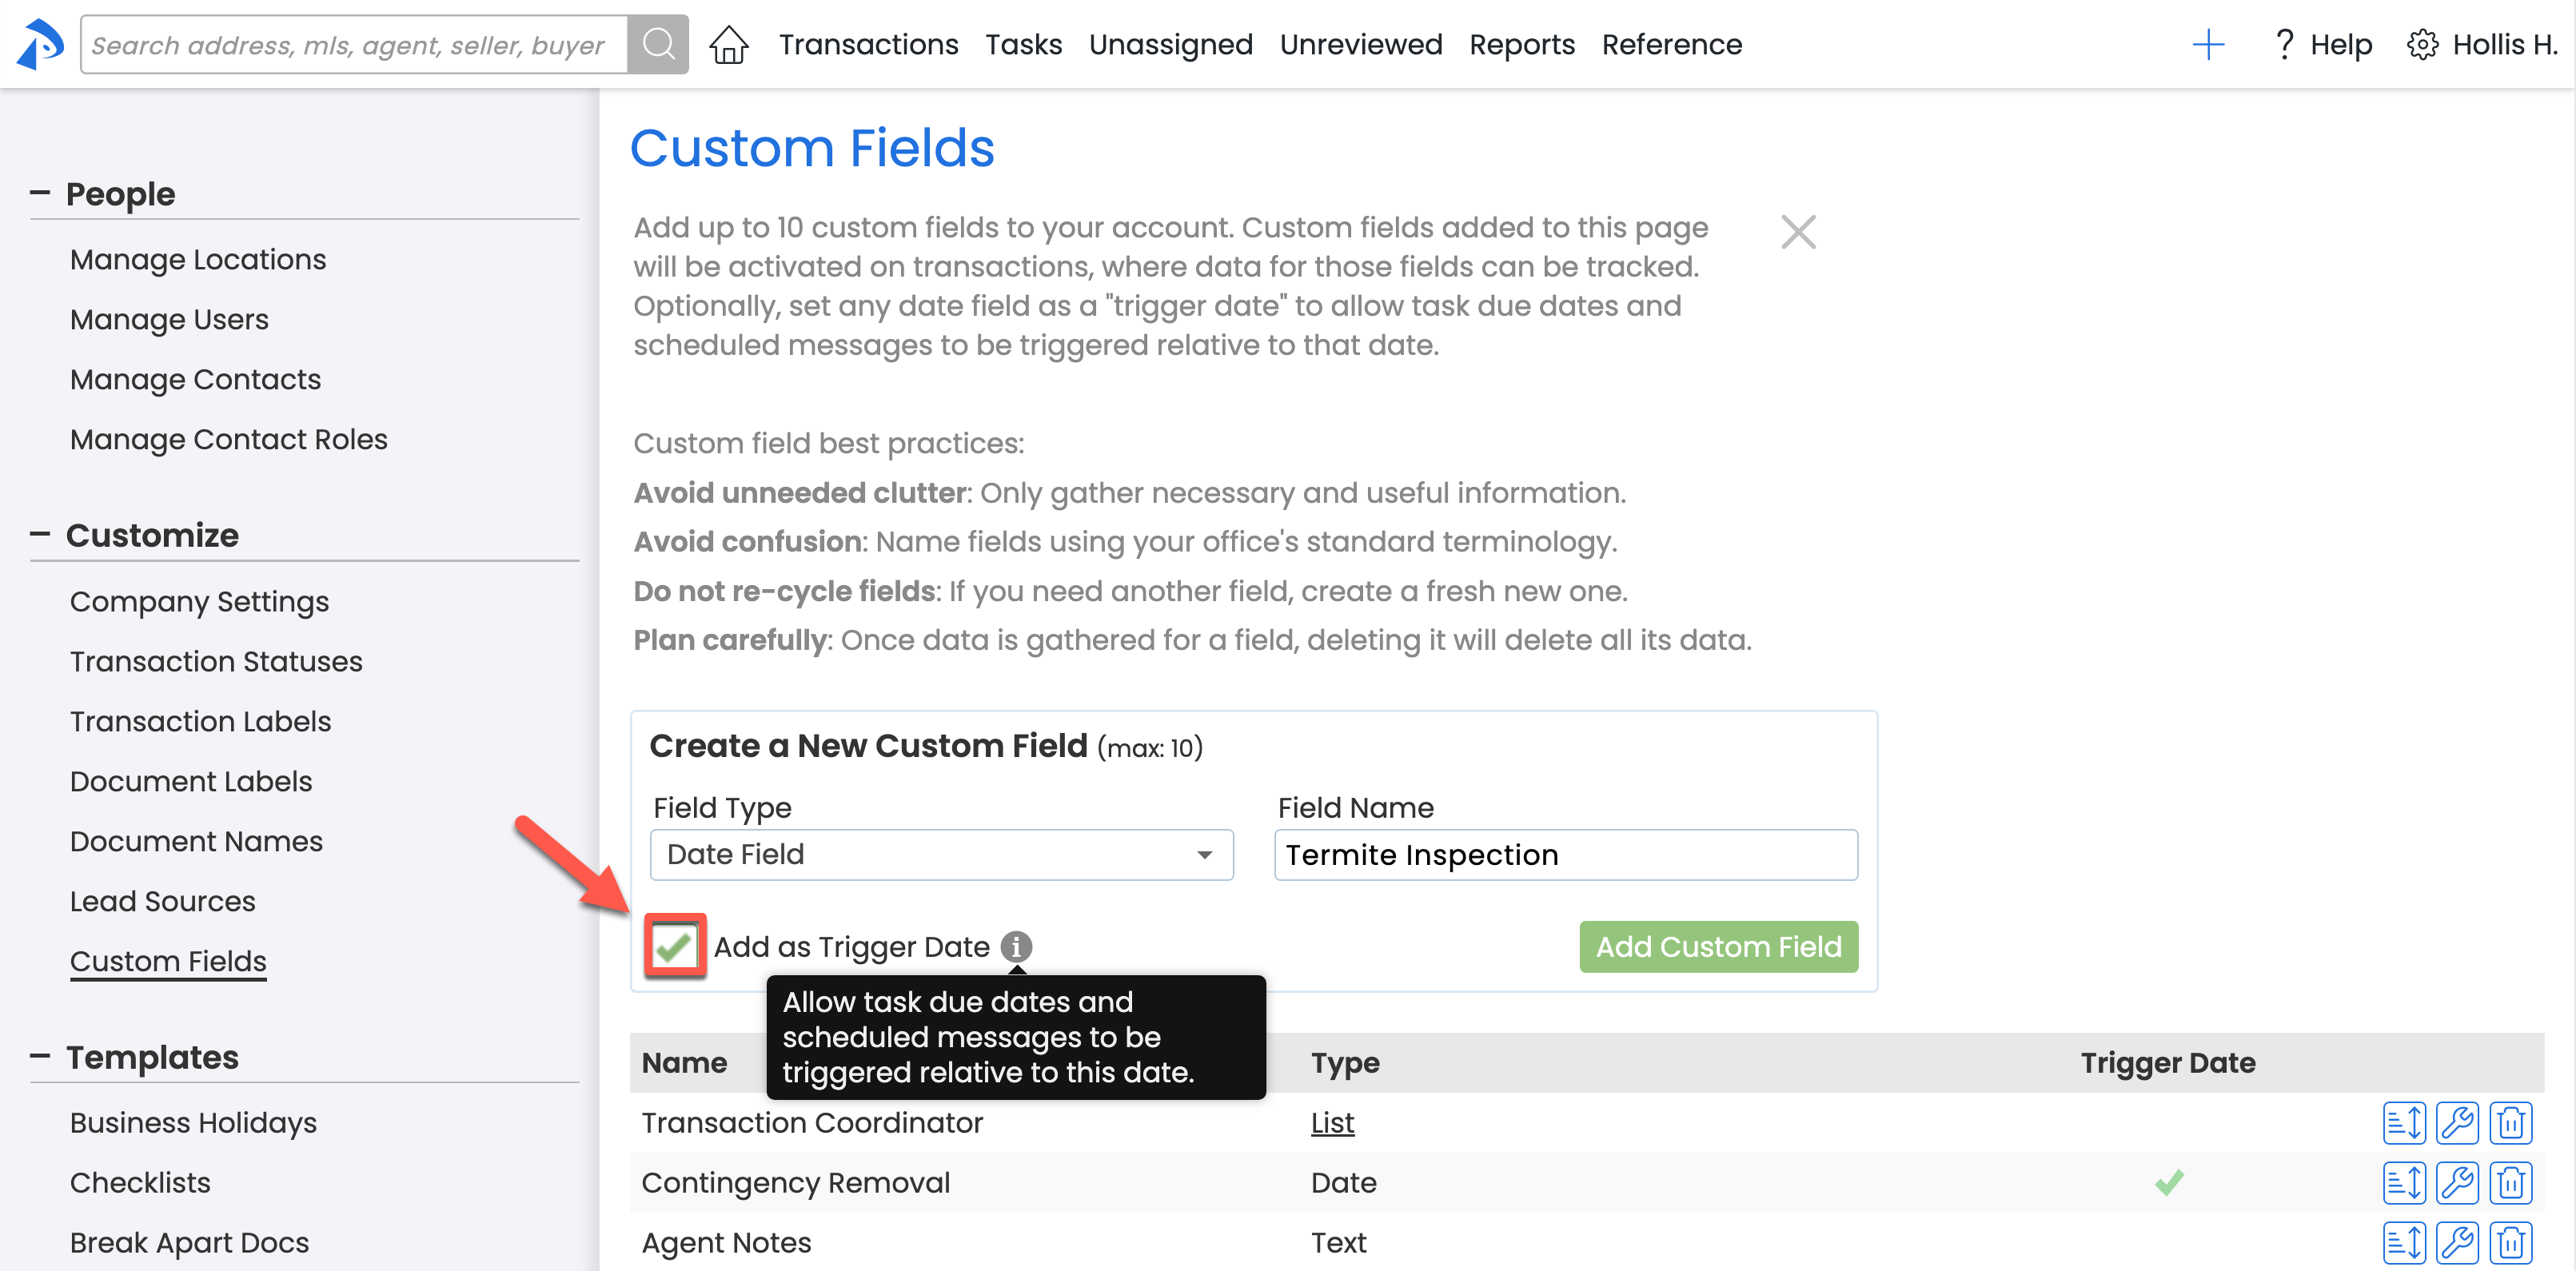
- Click [Add Custom Field].


Edit a Custom Field
Learn how to make changes to a Custom Field and understand the impact those changes will have.
To edit a custom field:
- Go to Admin / Settings by clicking your name in the upper right corner, then [Admin / Settings].
- Select [Custom Fields] from the Customize section of the left menu.
- Click [the wrench] to the right of the field you want to edit.
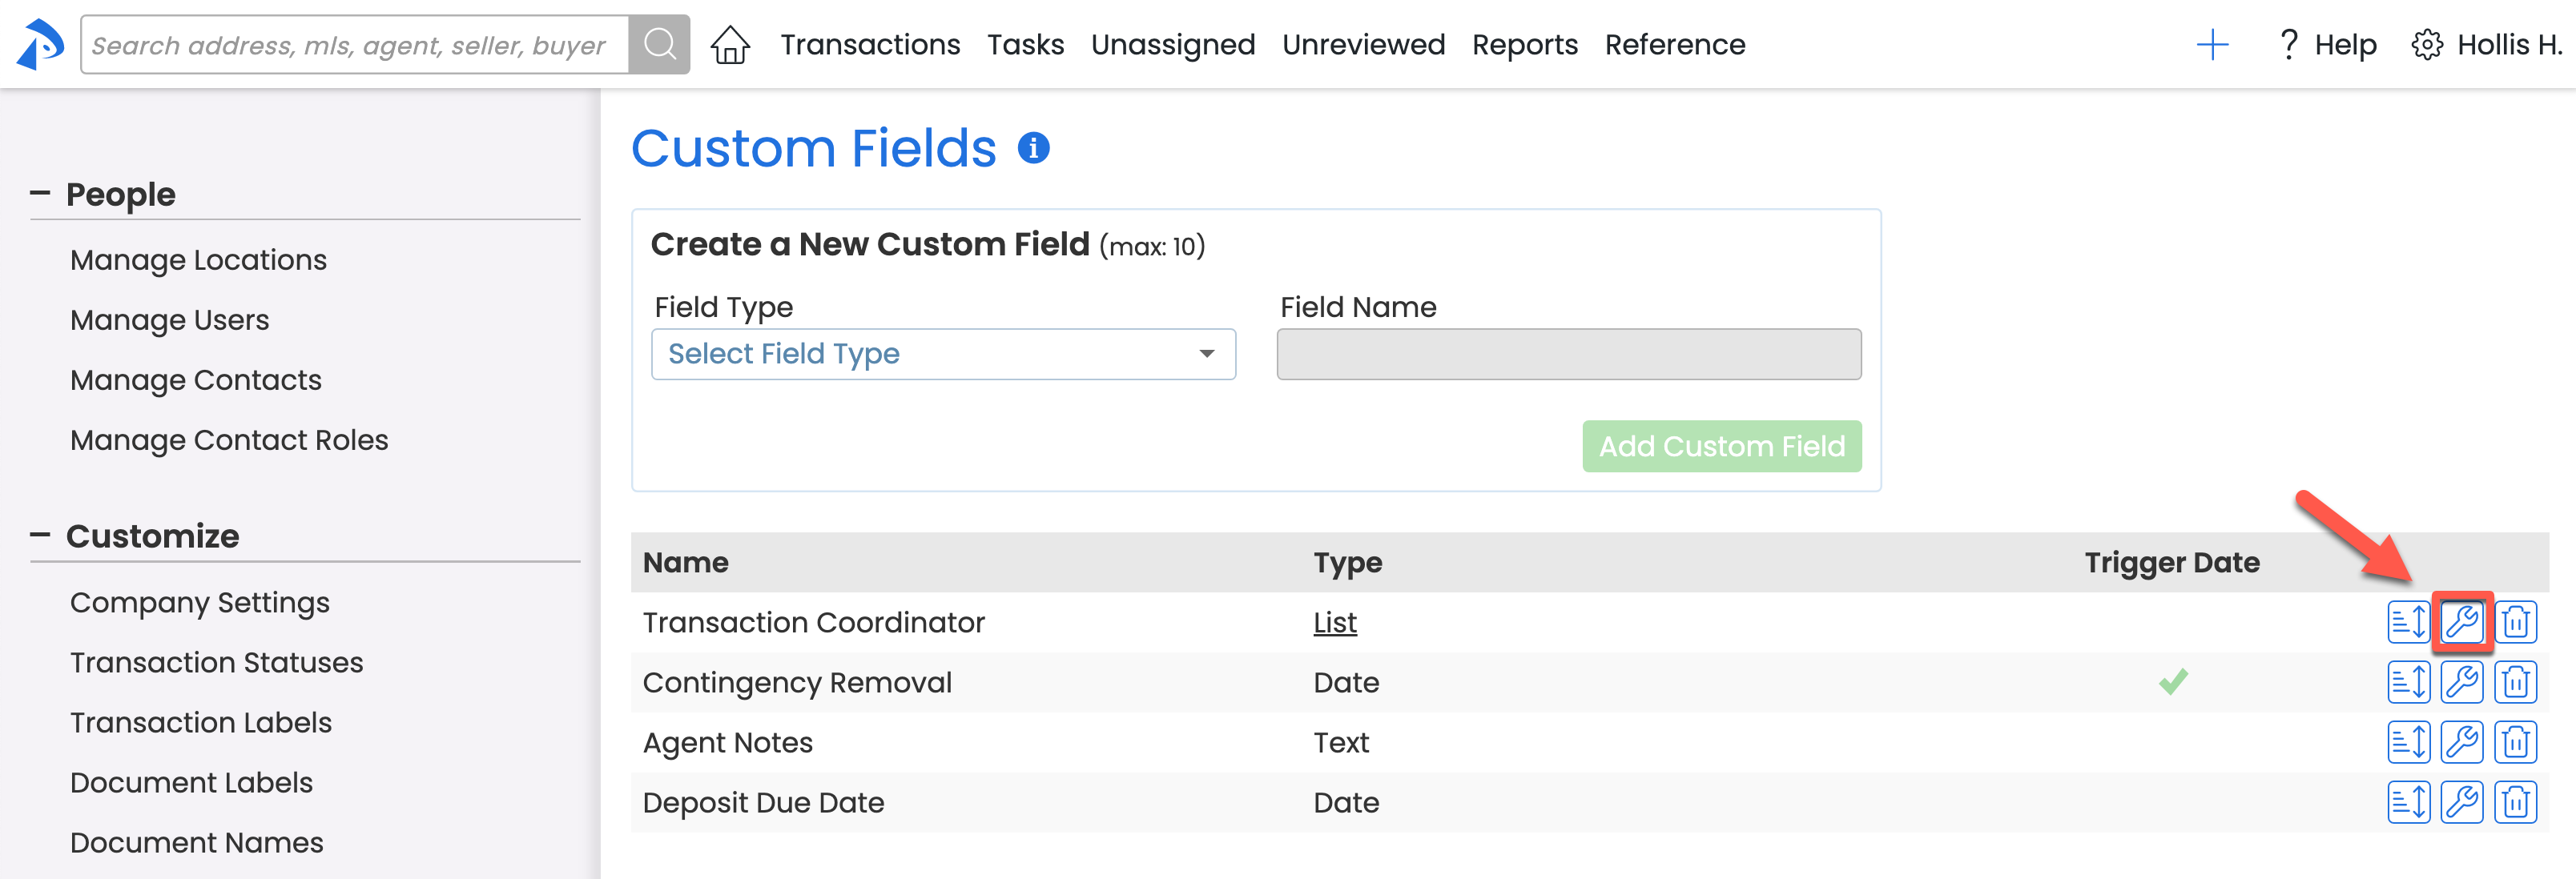
- Make your desired changes to the field.
- Click [Save].

Delete a Custom Field
Learn how to permanently delete a Custom Field that is no longer needed.
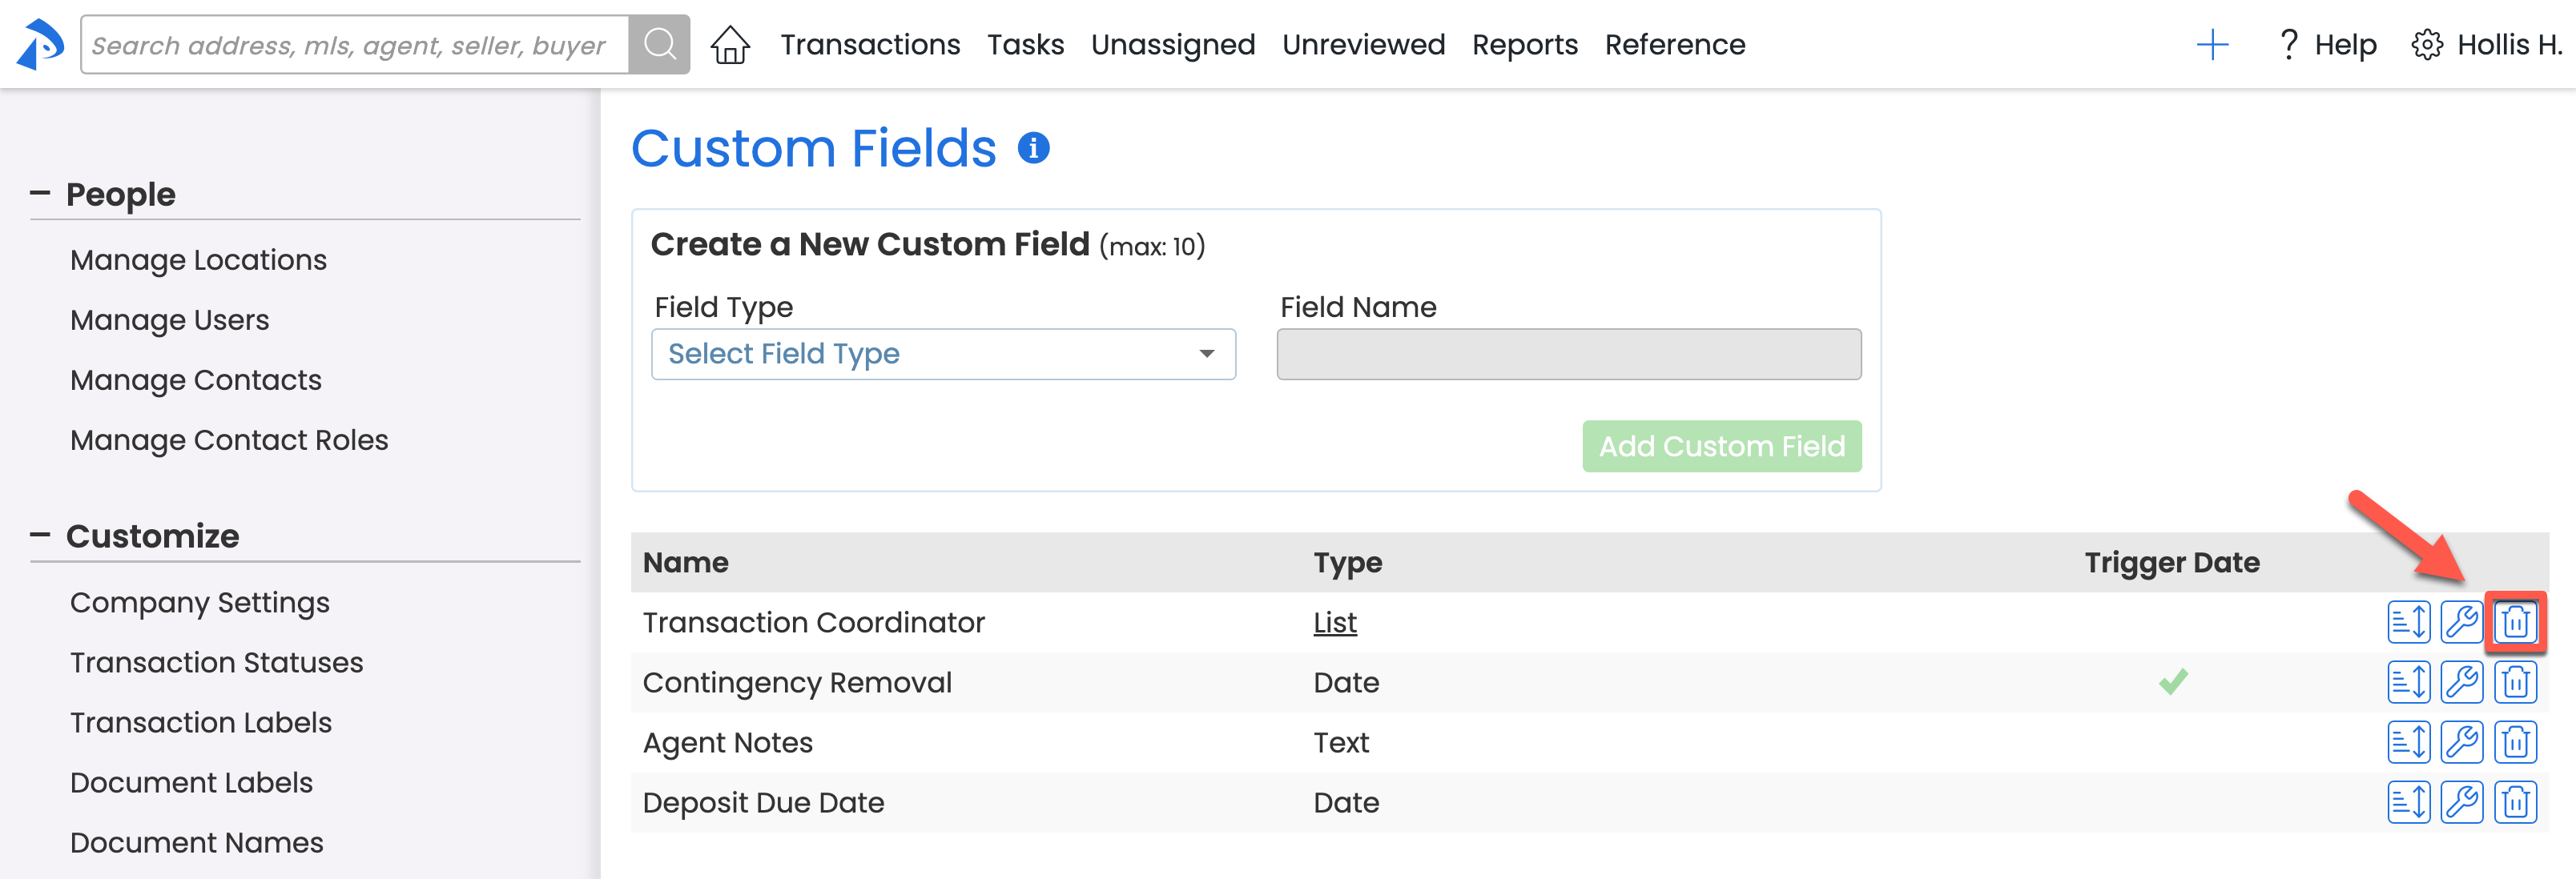
To delete a Custom Field:
- Go to Admin / Settings by clicking your name in the upper right corner, then [Admin / Settings].
- Select [Custom Fields] from the Customize section of the left menu.
- Click [the trashcan] to the right of the field you want to delete.
- Click [on these transactions →]
to review the list of transactions where this Custom Field has data that will be deleted.
 Download the resulting list to use as a backup of the Custom Field data you're about to delete. Learn how to Download a Transaction Spreadsheet →
 - Click [Permanently delete field and its data] to permanently delete the field and any related data.

